Blog
In my blogs I will focus on how to use crochet to create stuff that will make life easier or prettier... Read up as you might find some of them useful as well. Some designs will be for free and some designs will have a price... It all depends on the effort it went into making/researching/designing it.
Please check the list of the blog entries as the titles of each entry will more or less hint what it is about...
Sign up for a NEWSLETTER as among regular updates, there will be seasonal creations that you will want to check out so you can have the best ideas made into best stuff by you! Subscription available on Home.
2021-11-16
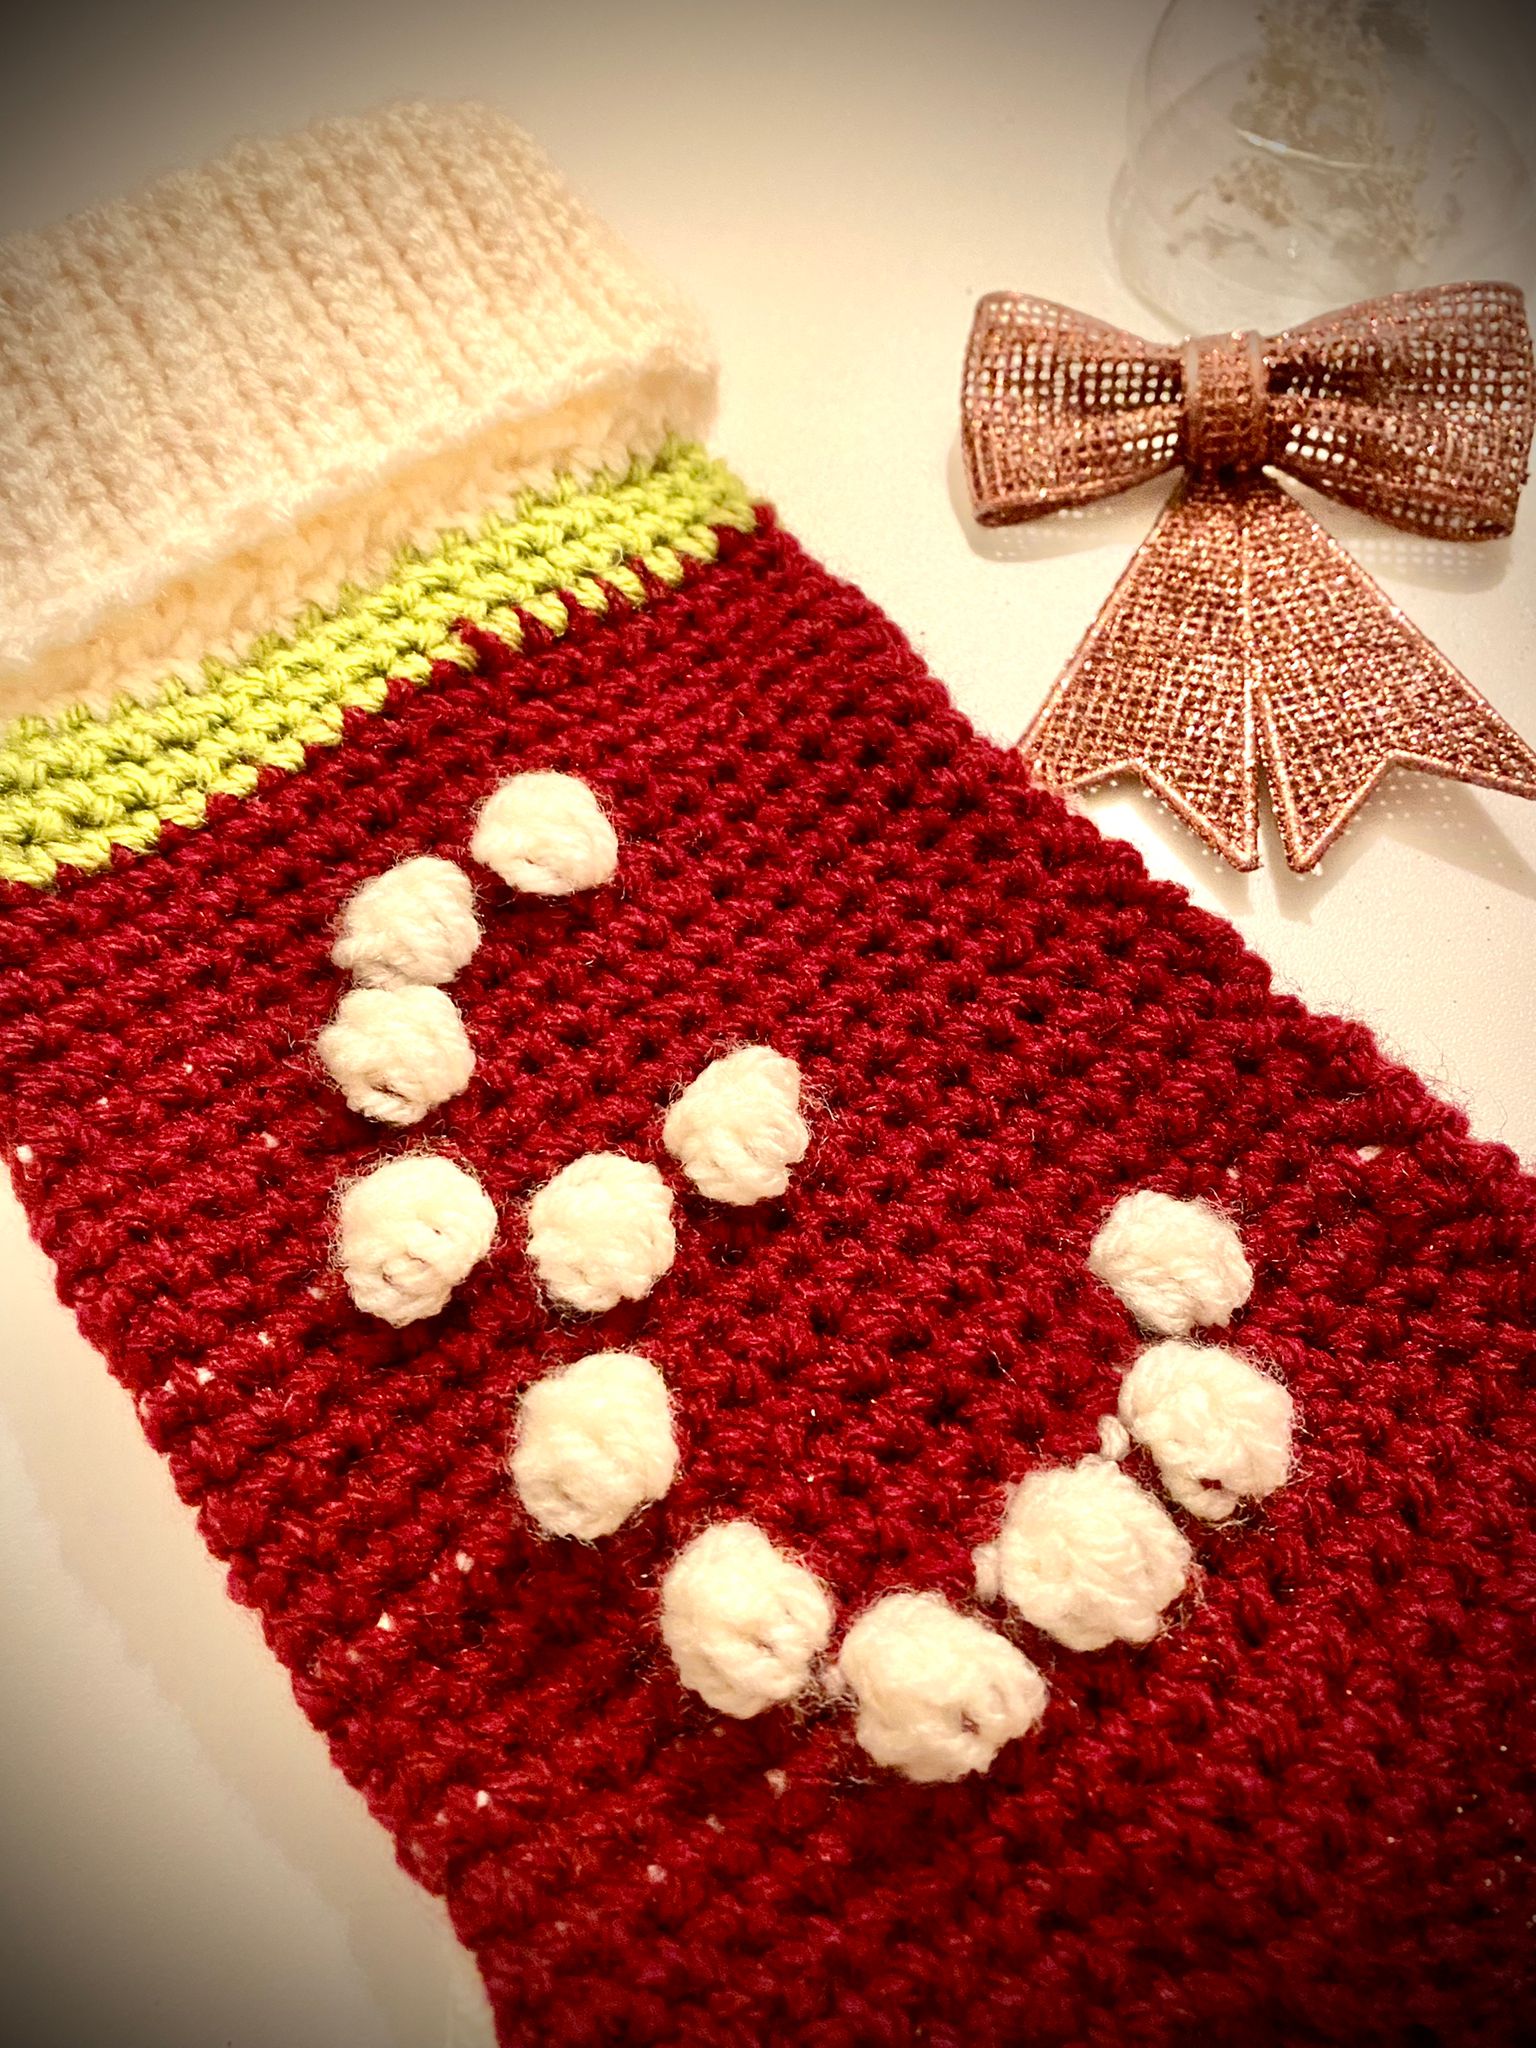
Bobbly Christmas Stocking
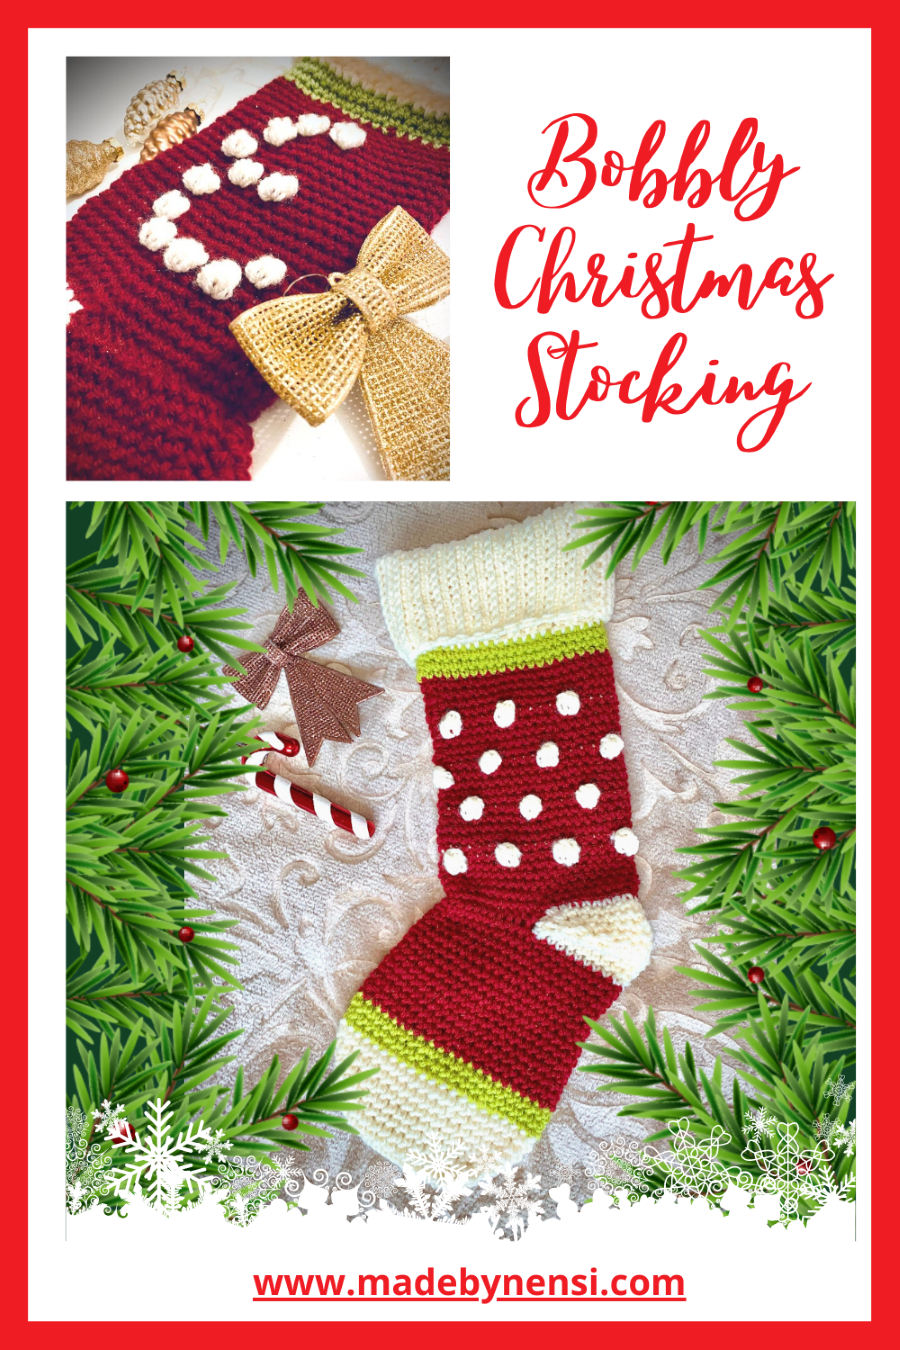
Bobbly Christmas Stocking
The holiday season is upon us… What I like to do every season is to make my own decorations. One thing I always wanted after experiencing Christmas in the US was to have a Christmas stocking made for my children. For now I only have a daughter and it was my goal to have a stocking for her this year!
This pattern is written in US crochet terms and abbreviations… It is meant for your personal use only, and you have permission to sell any stocking you make by this pattern, as long as you give the credit to me as designer. Photos I made are not to be used without my consent, especially not as promo material for your work.
Ad-free PDF is available for real cheap on Raverly and Etsy! Just click on the words Raverly or Etsy and you will go straight to the PDF in my shops.
Follow me on IG, FB or Pinterest to get updates on my designs as soon as they get released. Make sure the newsletter is going to the right inbox, so you don’t miss any new releases and discounts!
Material:
-Stylecraft Special DK
-3 colors of this yarn or any worsted weight yarn
-6mm hook/J-10
Please use the stich markers if you have them or tie a small string of yarn around the first stitch…
Finished stocking will be approx 18 inches (~45cm) in length and 6 inches (14cm) in width. This will vary based on yarn and hook you use. The bulkier the yarn the bigger the sock, and if you switch to a bigger hook the swatch will be bigger, but you have to test how much bigger by making the swatch…
Abbreviations (US terms):
Ch-chains
Sc- single crochet
Slst- slip stitch
Sc2inc- increase by doing 2sc in same stitch
Sc2tog- decrease of 2 sc’s into 1 sc
BLO- back loop only
FLO- front loop only
Xsc- do X sc in same stitch
ScX- sc in each of next X stitches
Bobble stitch will be done with the ch above to secure the bobble, usually not counted as a part of bobble stitch but here it will be!
Swatch
10sc by 10 rows= square
Wide=2 and ¾ inches (7cm)
Length=2 and ¾ inches (7cm)
IMPORTANT:
Ch1 at beginning of the round is NOT counted as stitch. It only gives room for the slst at the end of round to join.
Ch2 at beginning of the round IS counted as stitch.
Start is at the toes.
Personalization I did (the first letter of my child’s name, which I did to the front of the sock is explained in the end of the pattern, so you can make it any letter you want).
Ch’s within the round (so not starting one) are NOT counted as stitches.
Slst at the end of each round is NOT counted as stitch.
Instructions:
Foot
Round 1
Ch12
Round 2
2Sc in 2nd ch from the hook, sc in all ch’s until last ch, 4sc in last ch. Do not turn your work as it continues around the first Round-working in round. 1sc in all the ch until last ch, 2sc in last ch, slst to join =26st
Round 3
Ch2+sc in same st, sc11, (sc2inc)x2, sc11, sc2inc, slst to join =30st
Round 4
Ch2, sc in all sc, slst to join =30st
.jpeg&filetype=image)
Round 5
Ch2+ sc in same st, sc13, (sc2inc)x2, sc13, sc2inc, slst to join =34st
Round 6
Ch2, sc in all sc, slst to join =34st
Round 7
Ch2 + sc in same sc, sc15, (sc2inc)x2, sc15, sc2inc, slst to join =38st
Round 8
Ch1, sc in all sc, slst to join =38st
Round 9
Ch2 + sc in same sc, sc17, (sc2inc)x2, sc17, sc2inc, slst to join =42st
Switch to color green yarn
Round 10-12
Ch1, sc in all sc, slst to join =42st
Switch to color red yarn
Round 13-27
Ch1, sc in all sc, slst to join =42st
Round 28
Ch1, slst12, ch18 (heel opening), sk 18 sc, slst12, slst to join=42st
Round 29
Ch1, slst12, sc18, slst12, slst to join=42st
Round 30-35
Ch1, sc in all sc’s, sc in all ch’s, slst to join =42st
.jpeg&filetype=image)
Round 36
Start the round with both white and red yarn, carry white while you do red stitches and carry red while you do white bobble stitch, leave a white tail after slst
Ch1, (sc5-red yarn, bobble st-white yarn)x7, slst to join =42st
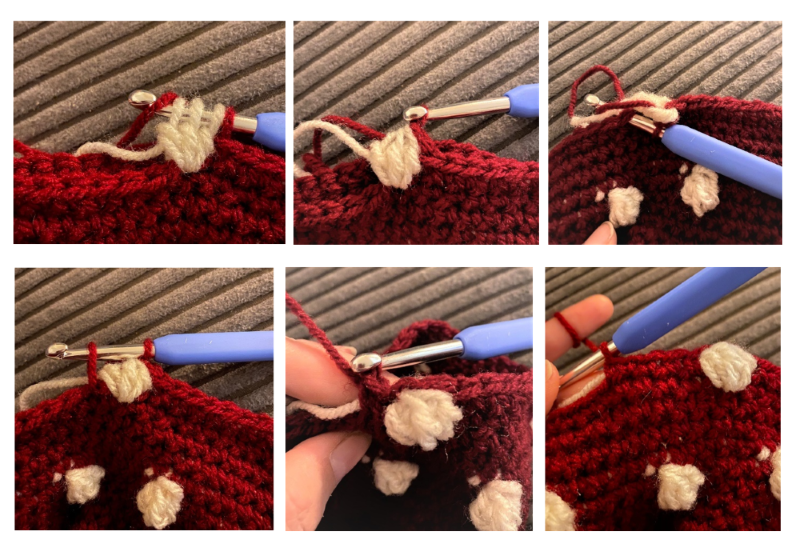
Bobble stitch and color change
Keep the red yarn in the back of the bobble st, do not carry inside the bobble st.
YO (white), insert in sc, YO, pull through the sc, pull through the first loop at the end of hook, YO (white), insert in same sc, YO, pull through the sc, pull through the first loop at the end of hook, YO (white), insert in same sc, YO, pull through the sc, pull through the first loop at the end of hook, YO (red), this results in 5 loops on your hook (first red on the hook, three white and last red loop YO)-photo 1. Pool the last YO (red) loop through the other 4 loops -photo 2. Insert hook in next sc, YO (red)-while carrying the white yarn (between the sc and the YO), pull through the sc -photo 3. YO and pool through the loops on the hook, fastening the bobble st. Pull the red yarn a bit to equalize the stitches to same size in case you fastened too lose.
Round 37-40
Continue in red yarn
Ch1, sc in all sc, slst to join =42st
Round 41
Start the round with both white and red yarn, carry white while you do red stitches and carry red while you do white bobble stitch, leave a white tail after slst.
Ch1, sc3-red yarn, Bobble st-white yarn, (sc5-red yarn, Bobble st-white yarn)x6, sc2, slst to join =42st
Round 42-46
Continue in red yarn
Ch1, sc in all sc, slst to join =42st
Round 47
Start the round with both white and red yarn, carry white while you do red stitches and carry red while you do white bobble stitch, leave a white tail after slst.
Ch1, (sc5-red yarn, Bobble st-white yarn)x7, slst to join =42st
Round 48-52
Continue in red yarn
Ch1, sc in all sc, slst to join =42st
In case you think this makes the stocking too short you can add more rounds as repeats of Rounds 41-52…
Switch to green yarn
Round 53-55
Ch1, sc in all sc, slst to join=42st
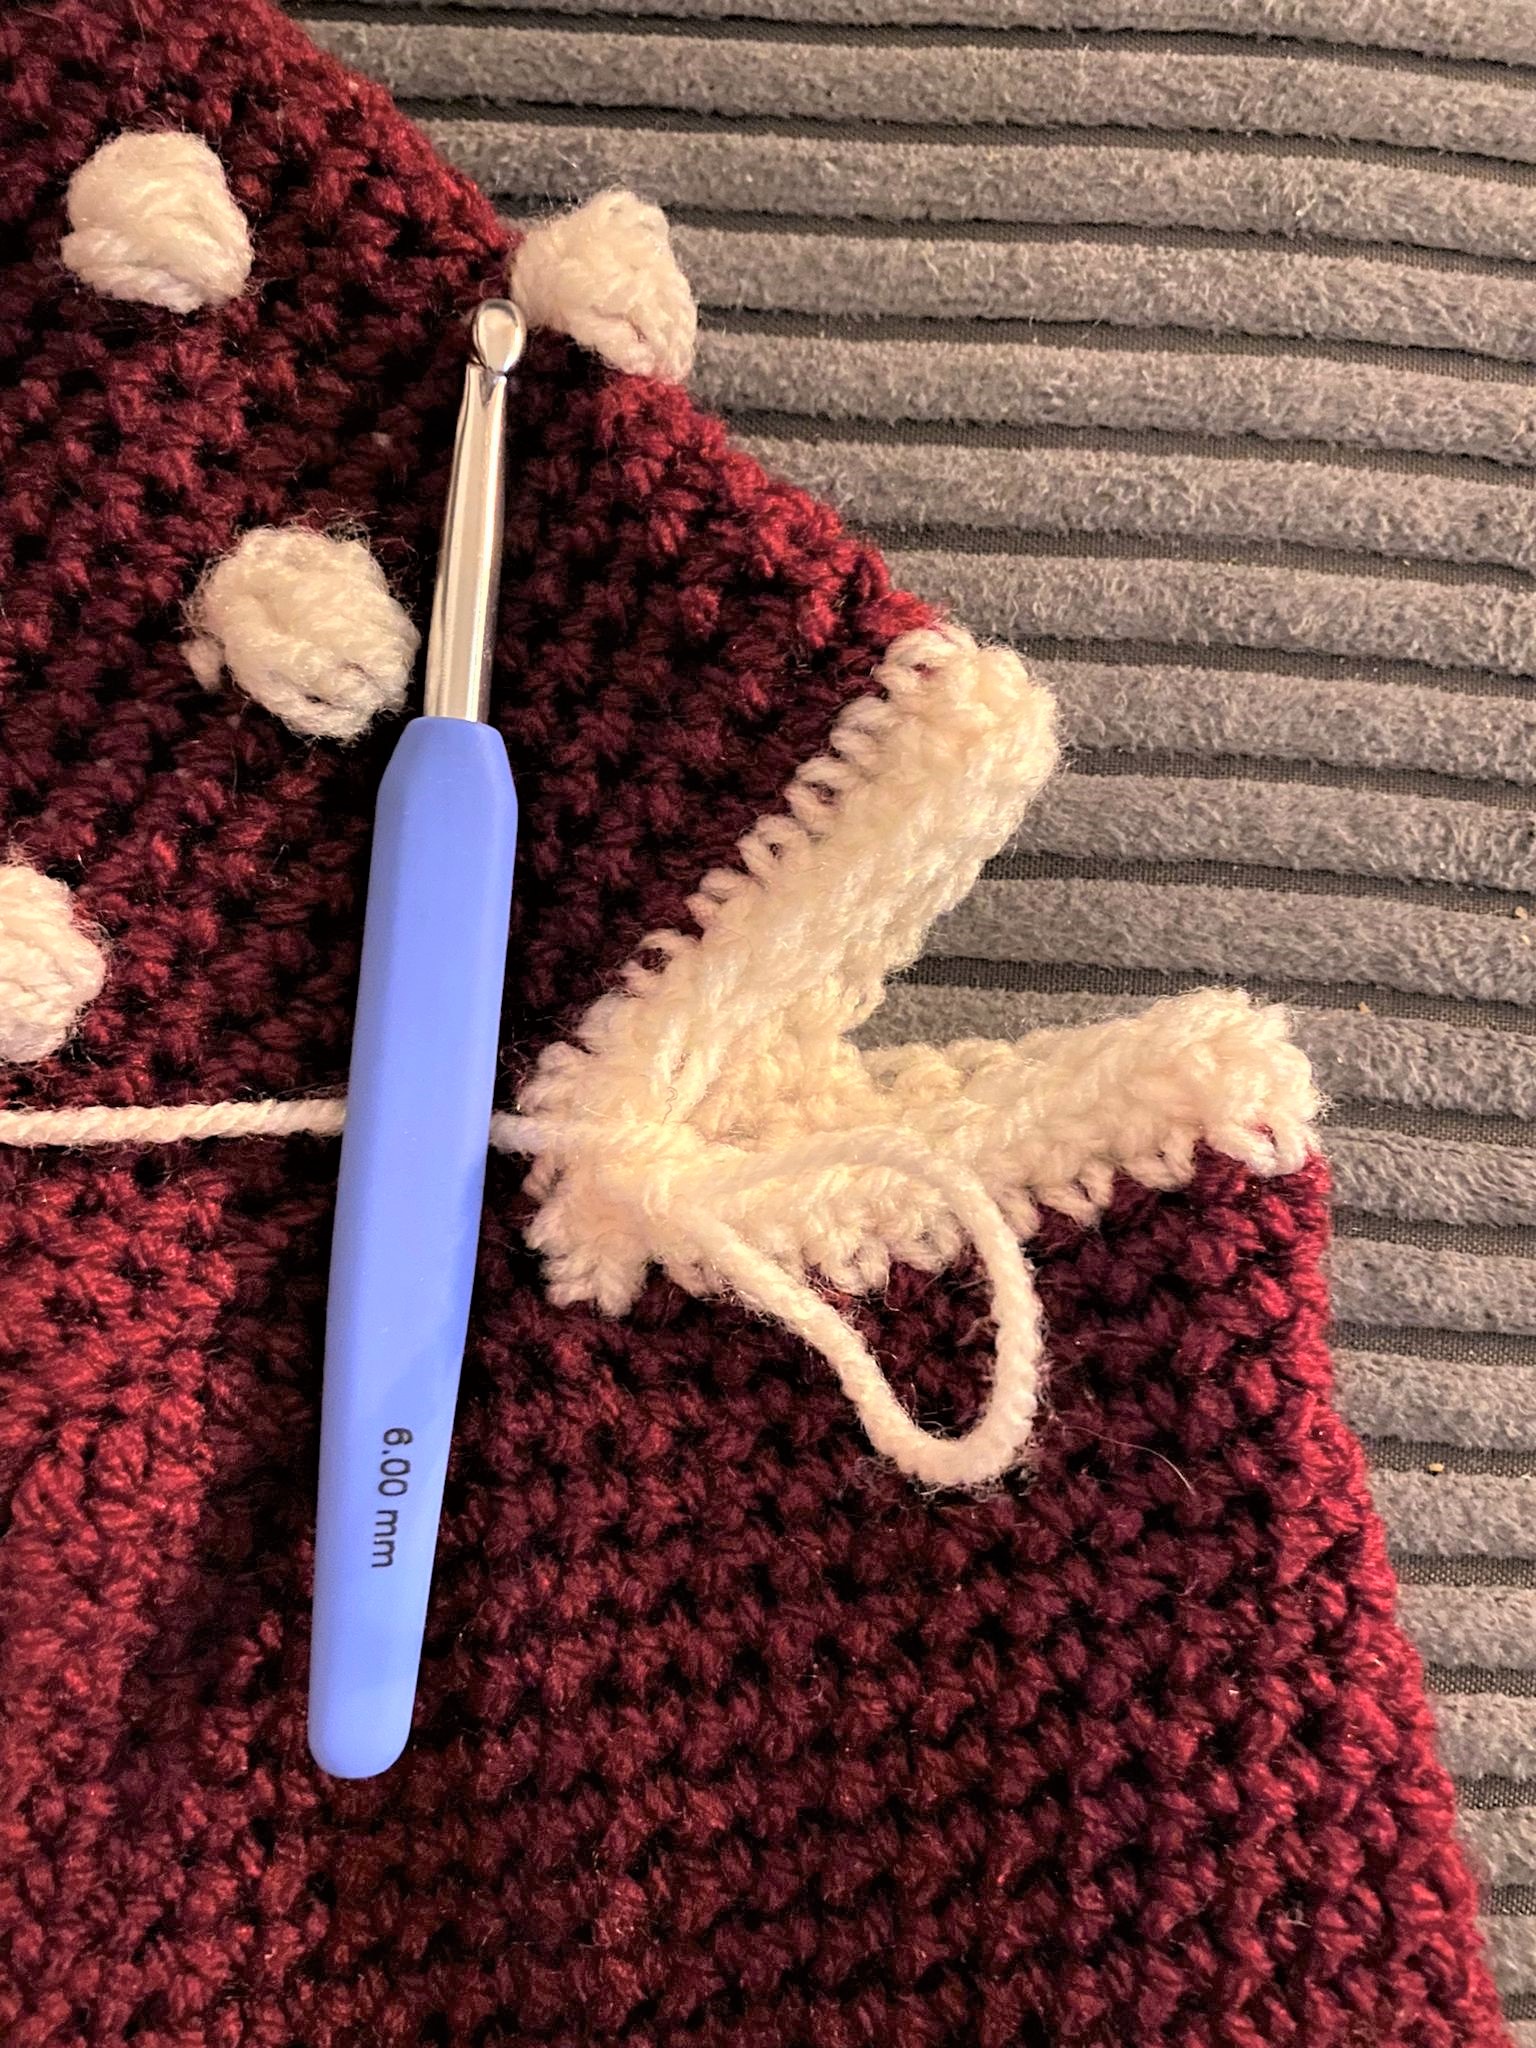
Heel
Join white yarn at the end of the Round 28 (corner of the opening of the heel), continue working around the opening of the heel.
Round 1
Ch1, sc2tog in sc, sc14, sc2tog, slst in corner of the heel (round 28 other side)- do not turn, continue around the heel opening, sc2tog, sc14, sc2tog, slst to join =32st plus extra slst
Round 2
Ch1, sc2tog, sc12, sc2tog, skip slst from round 1, sc2tog, sc12, sc2tog, slst to join =28st
Round 3
Ch1, sc2tog, sc10, sc2tog, skip slst from round 1, sc2tog, sc10, sc2tog, slst to join =24st
Round 4
Ch1, sc2tog, sc8, sc2tog, skip slst from round 1, sc2tog, sc8, sc2tog, slst to join =20st
Round 5
Ch1, sc2tog, sc6, sc2tog, skip slst from round 1, sc2tog, sc6, sc2tog, slst to join =16st
Round 6
Ch1, sc2tog, sc4, sc2tog, skip slst from round 1, sc2tog, sc4, sc2tog, slst to join =12st
Round 7
Ch1, sc2tog, sc2, sc2tog, skip slst from round 1, sc2tog, sc2, sc2tog, slst to join =8st
After this round you can connect the sides (stitch the opening closed on the inside of the sock).
Ribbing around the top of the stocking
Round 1
Ch26
Round 2
Starting from second ch from the hook, sc25, turn
Round 3
Ch1, slst25 in FLO, turn
Round 4
Ch1, sc25 in BLO, turn
Round 5-50
Repeat rounds 3 & 4 alternately, stitch the ends together and then sew to the sock
50 rounds should match well with the width of the sock.
The ribbing will have two sides and you can choose with side will be outside and which one on the inside, do not forget the ribbing will be folded outwards. I chose second one to be on the inside of the sock, so when folded outwards that will be the side to see…
Personalization
Is available only in the PDF version.

After you make a stocking, please do tag me if you post on social media as I loooove to see the makes by my pattern! I will share on my stories if you would like, as well…
COPYRIGHT: You MAY NOT in any form reproduce or distribute this pattern in part or in whole through any venue, electronic, mechanical or otherwise without the written authorization of the publisher/designer, or in other words without my permission. Also any use of my photos is not permitted. You are granted permission to sell the finished product for profit, on a non commercial scale and as long as I am credited as the designer.
Until next time, my yarnie friend!
Admin - 00:20:41 | Add a comment
Add comment
Fill out the form below to add your own comments